Story and photos by Anna Foster
Supplies:
- 3yds Felt
- Scissors
- Sewing machine or hand sewing needle and thread
- Ribbon
This fun, hooded cape is perfect for the little Elf or Hobbit in your life. The same pattern can be used in red for Little Red Riding Hood and could be the base for many animals as well with the addition of some felt ears. Felt is perfect for a quick costume because you don’t have to finish the edges after you cut them!
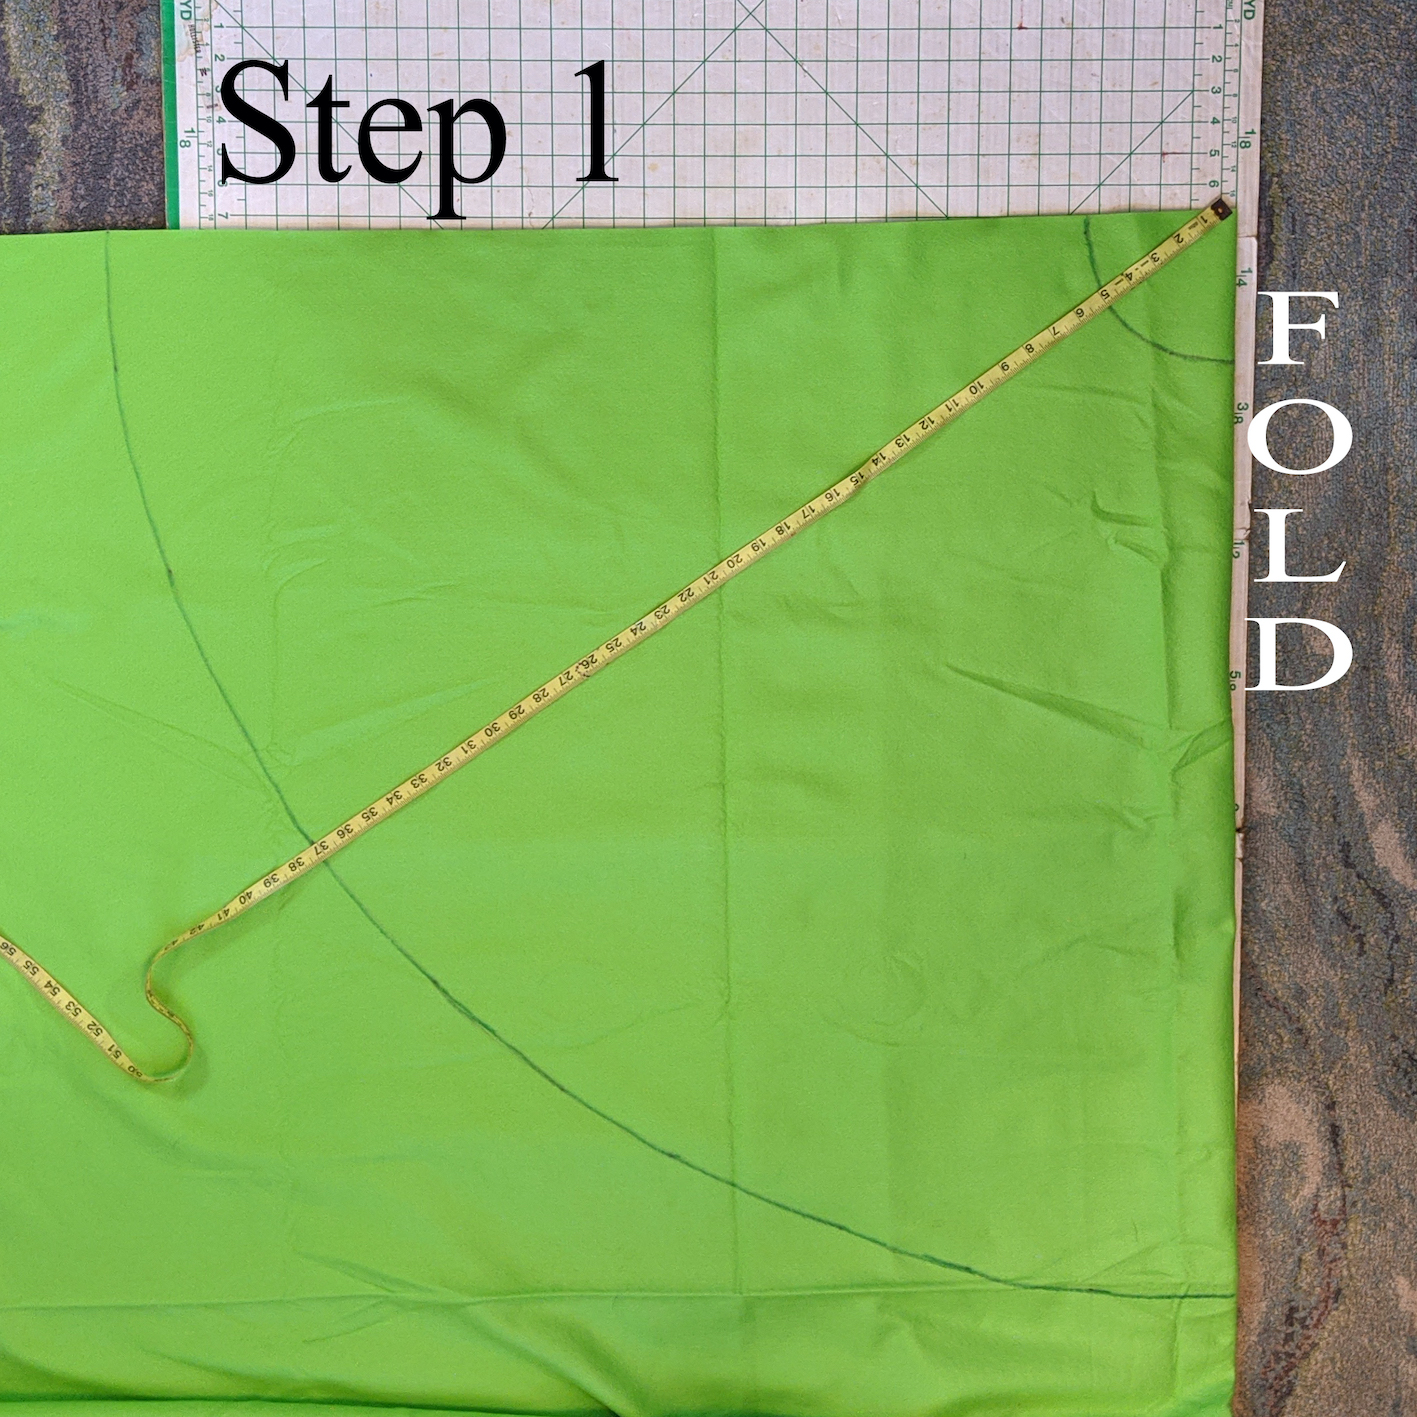
Step 1: Fold your felt in half and using your tape measure as a compass, make an arc at 5 inches and an arc at 37 inches using the corner with the fold as your center point. (this cape will fit 7-10 year old).
 Anna Foster
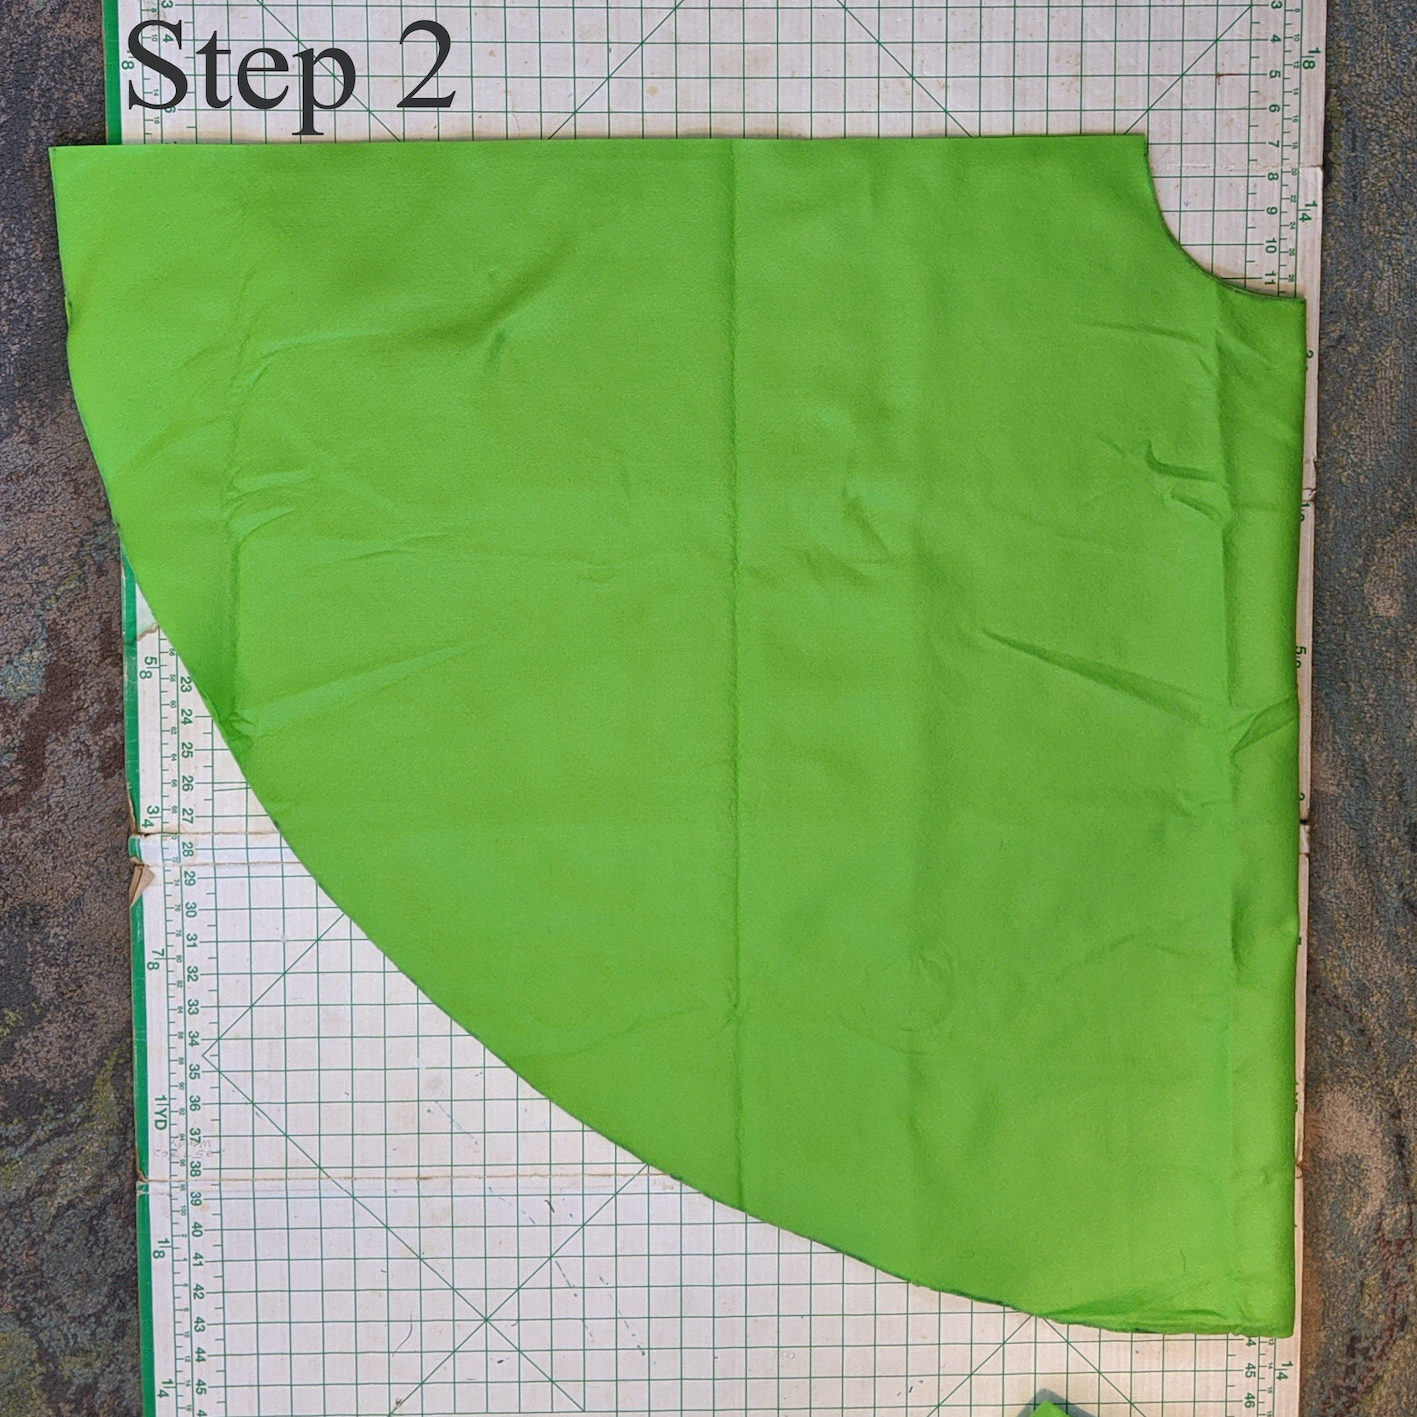
 Step2: Cut. Once you cut it out, the cape part is finished!
 Anna Foster
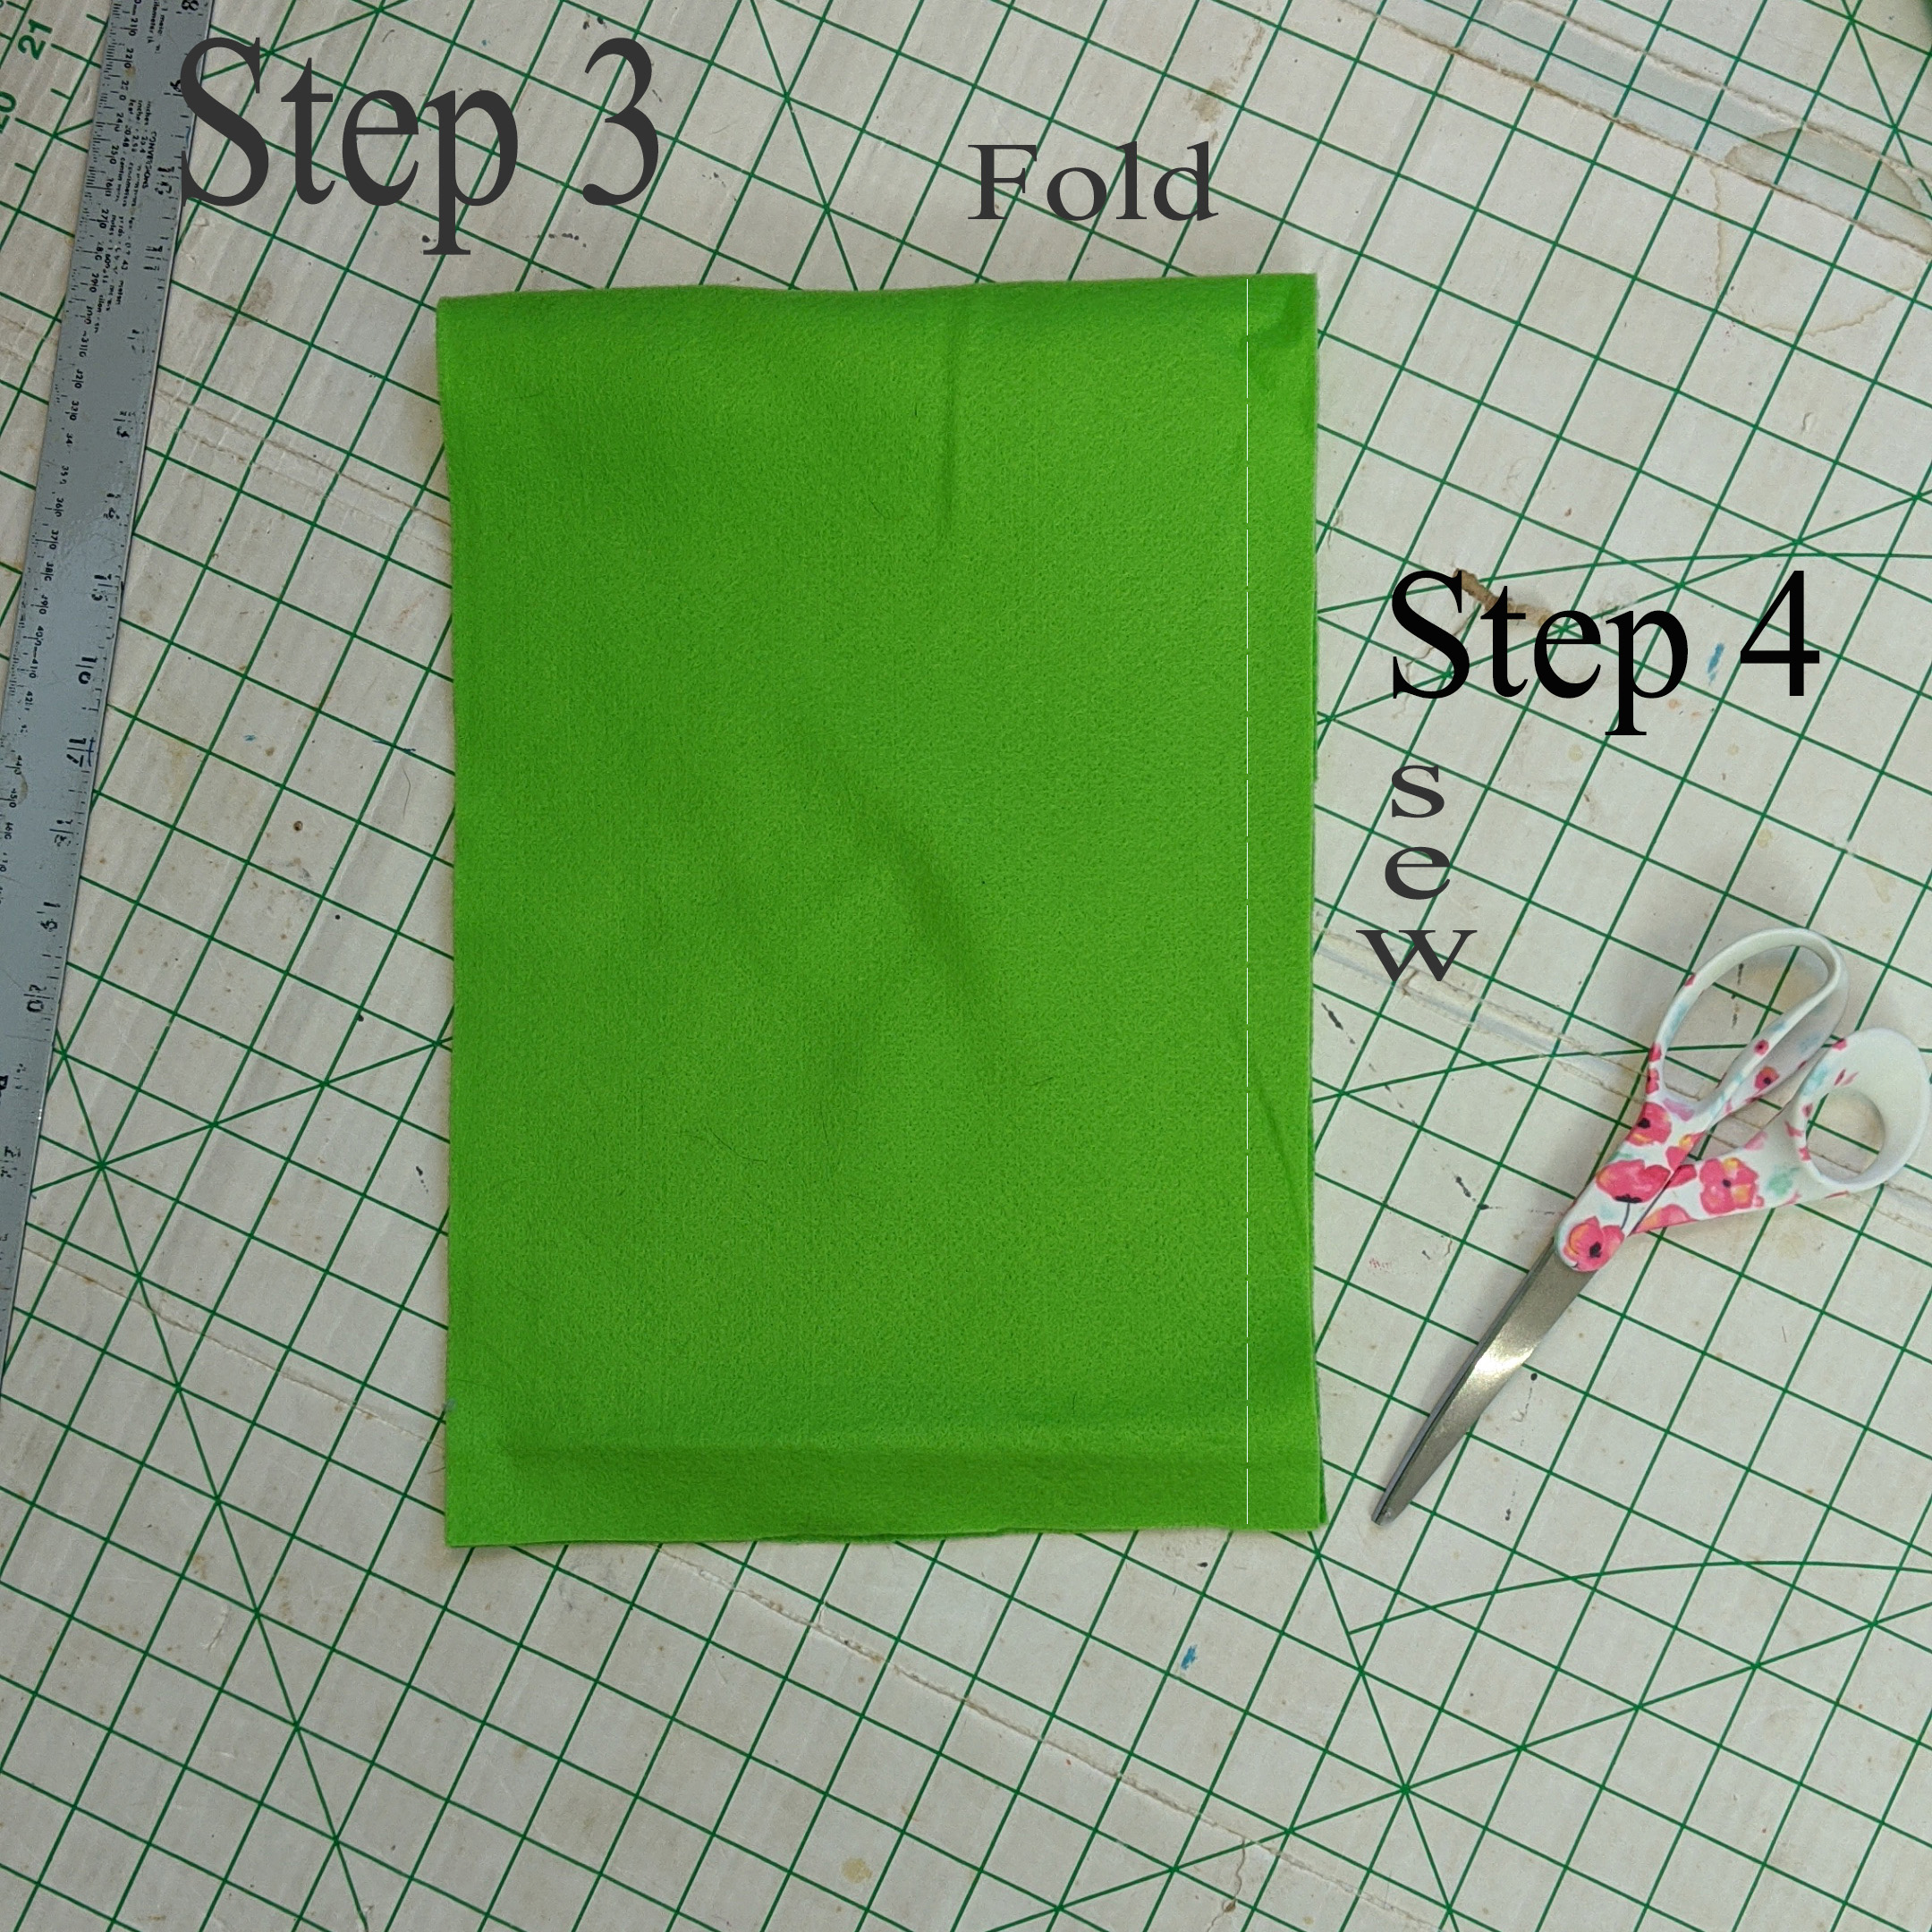
 Step 3: For the hood, cut a rectangle that is 30 inches by 10 inches. Fold the rectangle in half to make a 15 inch by 10 inch rectangle.
 Anna Foster
 Step 4: Using a sewing machine or sewing needle, sew one long edge together with a half inch seam. Now all we have to do is attach the hood to the cape!
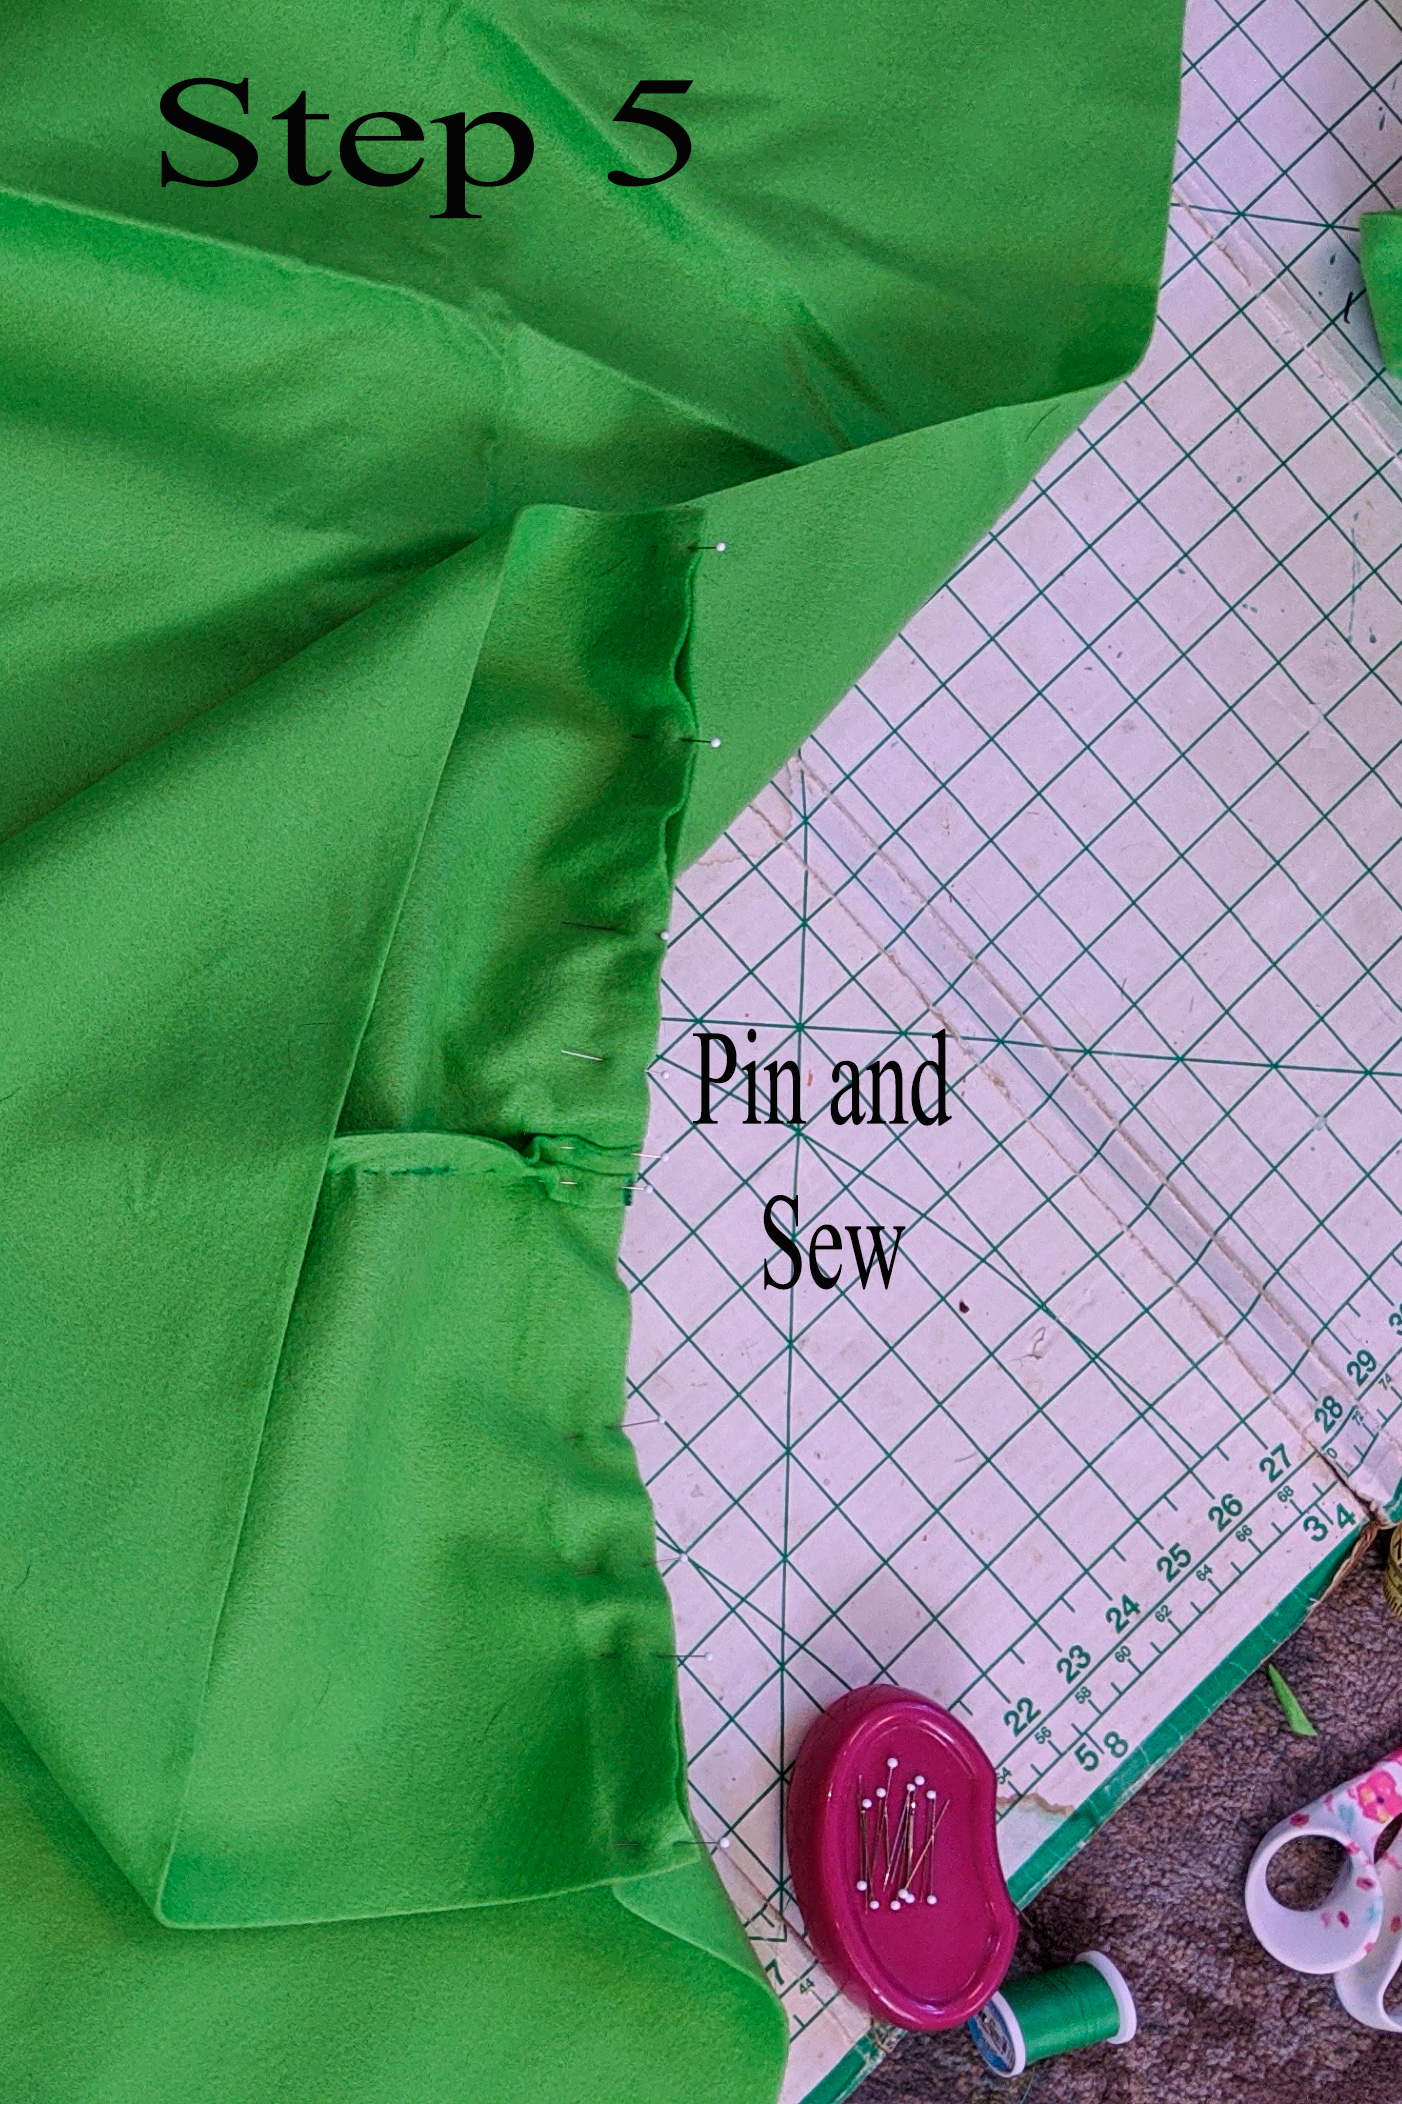
Step 5: Line up the center of the neck opening to the bottom of the hood seam (make sure right side of hood is against the right side of the cape). It helps to pin the centers and the ends and gently pull on the curve to make it fit.
 Anna Foster
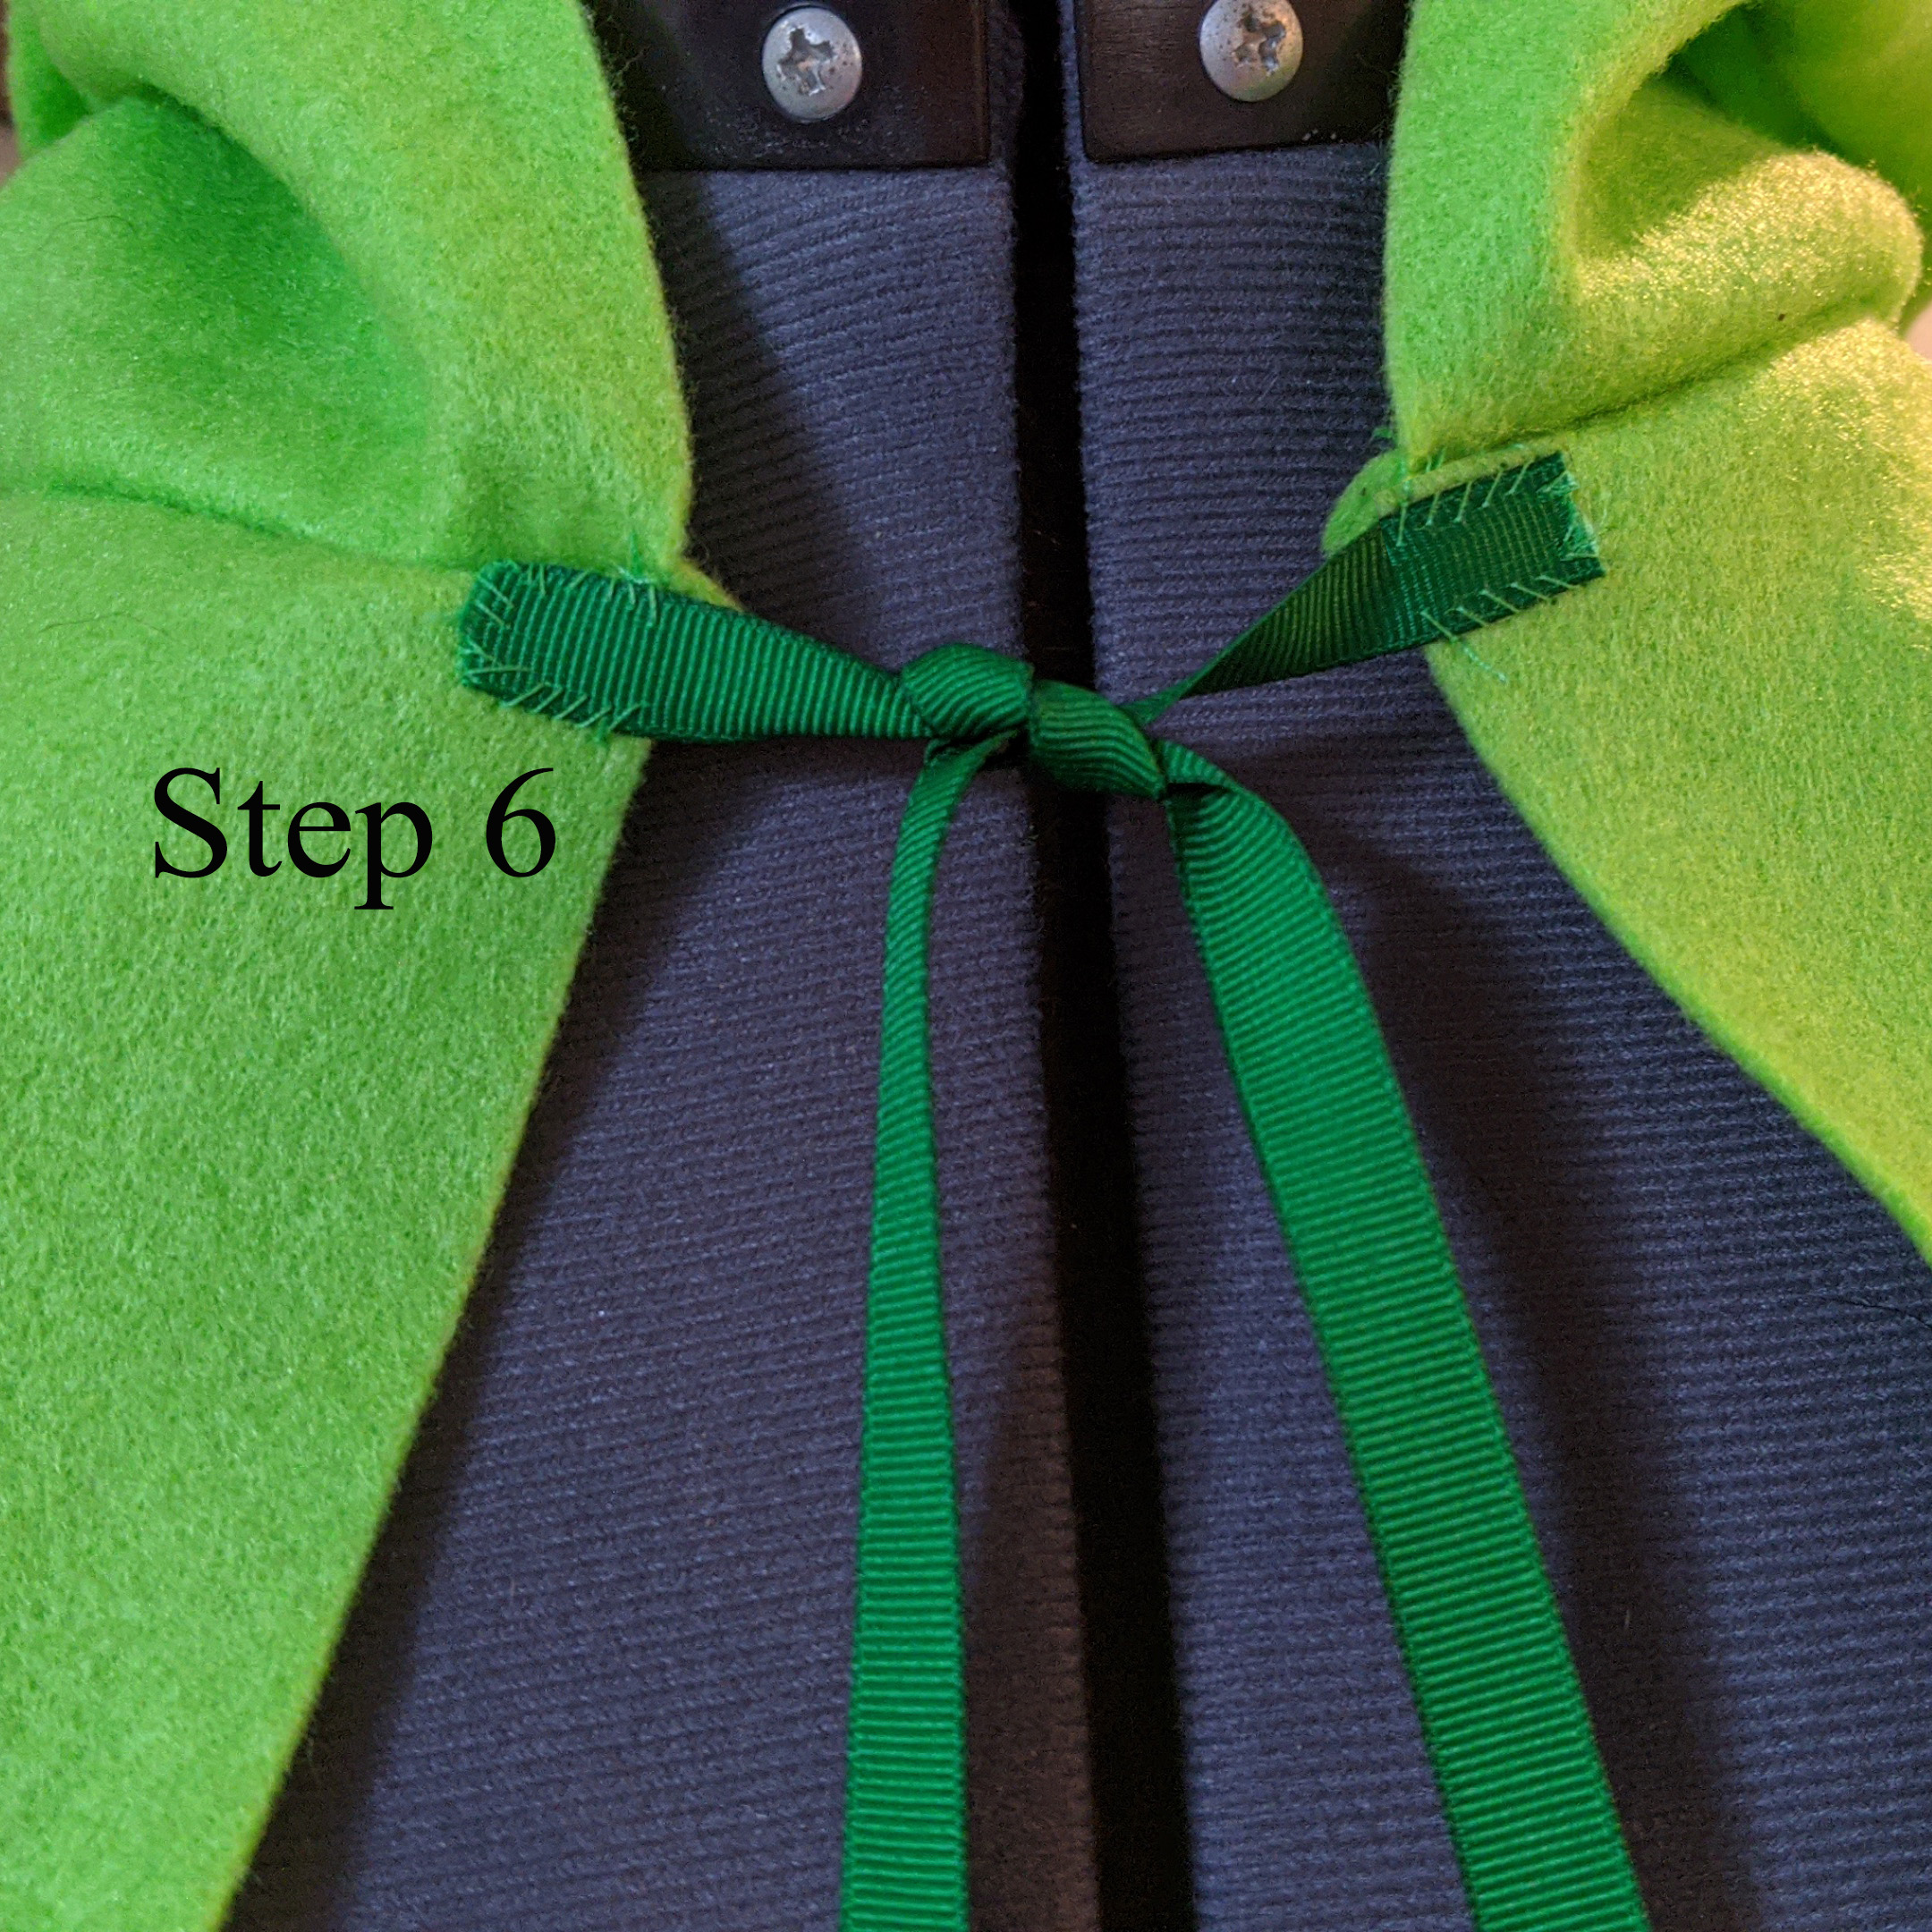
 Step 6: Attach ribbons to neck opening for closure. Now you have a perfect cape for Halloween or just every day dress up!
 Anna Foster