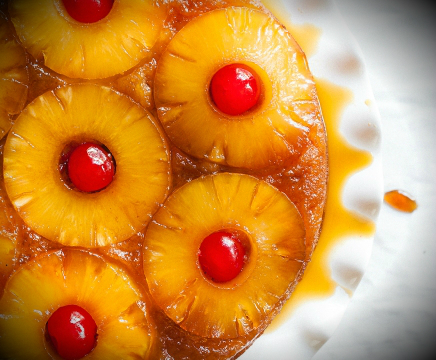
Cakes are one of the most favorite desserts of people around the world; however, people have mixed opinions on which type of cake is the best. Some like fruit cakes, some like cream pastries, and some like chocolate while others like plain sponge cakes. The good thing is there are a lot of different flavors and types of cakes that cater to different taste buds. One such classic favorite with most people is the upside-down fruit cake. The moment we hear the term up-side down cake, the first thing that comes to our mind is the classic mix of pineapple and cherry. But contrary to popular beliefs, almost any type of fruit can be used to make an upside down cake.
Fresh fruits like apples, peaches, nectarines, mangoes, all types of berries, apricots, bananas, figs etc can be used to substitute pineapple in an upside down cake. It is all about creativity and palettes, so as long as you like any certain fruit flavor you can make an upside down cake with the same. As much as you can, opt for fresh fruits as opposed to the canned variety as fresh fruits are high on nutrition and also taste better than canned fruits. However, it is a matter of personal choice as both these varieties work well for the cake. We have tried to simplify making an upside down fruit cake for you, so here are simple 9 steps to create upside-down fruit cake.
Here is a quick look at the ingredients for the cake
- Topping “unsalted butter“ 3 tablespoon
- Brown sugar ¼ cups
- 2-3 cups of seasonal fruits of your choice
- 3 tablespoon of fresh herbs like mint or thyme (optional) chopped
- Sponge “Sugar” cups
- Unsalted butter 150 grams
- 2 cups of white flour (all-purpose flour)
- salt to taste
- 1 teaspoon baking powder
- 2 eggs
- A pod of vanilla (vanilla essence would be fine too)
Instructions
1. Preheat the oven at 350F. Start dicing the fruits at the side, you can cut wedges but don’t dice in fine pieces. If you are using berries de-seed them and leave them whole and strawberries can be cut in wedges. For those opting for frozen fruit you don’t need to defrost them.
2. Next step is glazing the brown sugar; take your baking pan or iron skillet and start heating the butter on a low flame and add the brown sugar to the melted butter. Let the sugar melt and once done, turn off the flame.
3. Now for the cake batter beat the sugar and butter till the mixture is light and fluffy. You can use a stand mixer or the traditional way by beating in a bowl with a spatula. In a separate bowl mix the flour, salt and baking powder and once done beat the eggs in the mixture till the whole thing incorporates in to a smooth batter. Add a teaspoon of vanilla essence and combine thoroughly.
4. Arrange the fruit slices on the iron skillet on top of the glaze of butter and brown sugar. The fruit should be arranged in a crowded fashion as the fruits shrink after cooking. If you plan to use the herb, now is a good time to spread them on top of the fruit arrangement.
5. Now spread the cake batter on top of the fruit mixture and ensure that it is layered evenly.
6. At this point we will bake the cake, so transfer the cake pan or skillet into the oven and let it bake for 30 to 40 minutes at 350F. You can check if the cake is done by inserting a knife in the cake and if it comes out clean without any batter on the blade then your cake is cooked.
7. Let the cake rest on for a while so that the fruit juices get absorbed in the cake. Run a knife or a spatula around the edges, while the cake is hot. Flip the cake gently on the dish that you intend to serve in and remove the cake pan gently. At this point you need to be careful as the fruits at the bottom are still hot and also vigorous handling can topple your cake.
8. You can check the arrangement of the fruits and if any wedge is out of place, you can re-arrange the same and let the cake cool.
9. Cut in pieces and serve the cake. You can also top it with a layer of whipped cream for a rich taste. This cake can be stored for around 10 days in an airtight container.
This recipe is easy and fairly simple but the outcome is delicious. So as an easy but tasty dessert, it is a must try for your next house-party to show off your baking skills.
Author profile: Adam Evans is a team member at crockery supplies. He write blogs for restaurant reviews, improve catering business, recipes and more. In his free time he like to read about new places and try new recipes.