Story and photos by Corinna Pongracz
The other day, my little honey came home from a friend’s place and was super excited about a dreamcatcher that she saw in her friend’s room. A dreamcatcher that could catch nightmares and bad dreams, leaving only the good ones to pass through.
She was so enthusiastic about the idea that you’d only dream about nice things with a dreamcatcher, so I immediately started looking into the crafting of one.
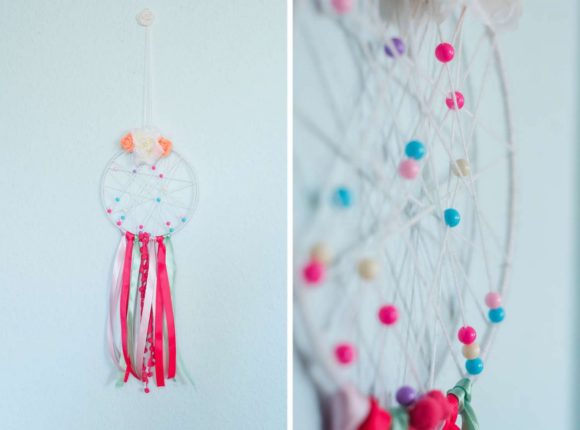
I found lots of great inspiration on the internet. But since my little monkey asks for princess-, fairy- and unicorn dreams every night, it was a sure thing that this dreamcatcher would turn out to be one with lots of pastel colors, pearls and ribbons.
So, I started looking for materials and crafted this beautiful, sweet-dreams dreamcatcher with my sweetheart:
You’ll need:
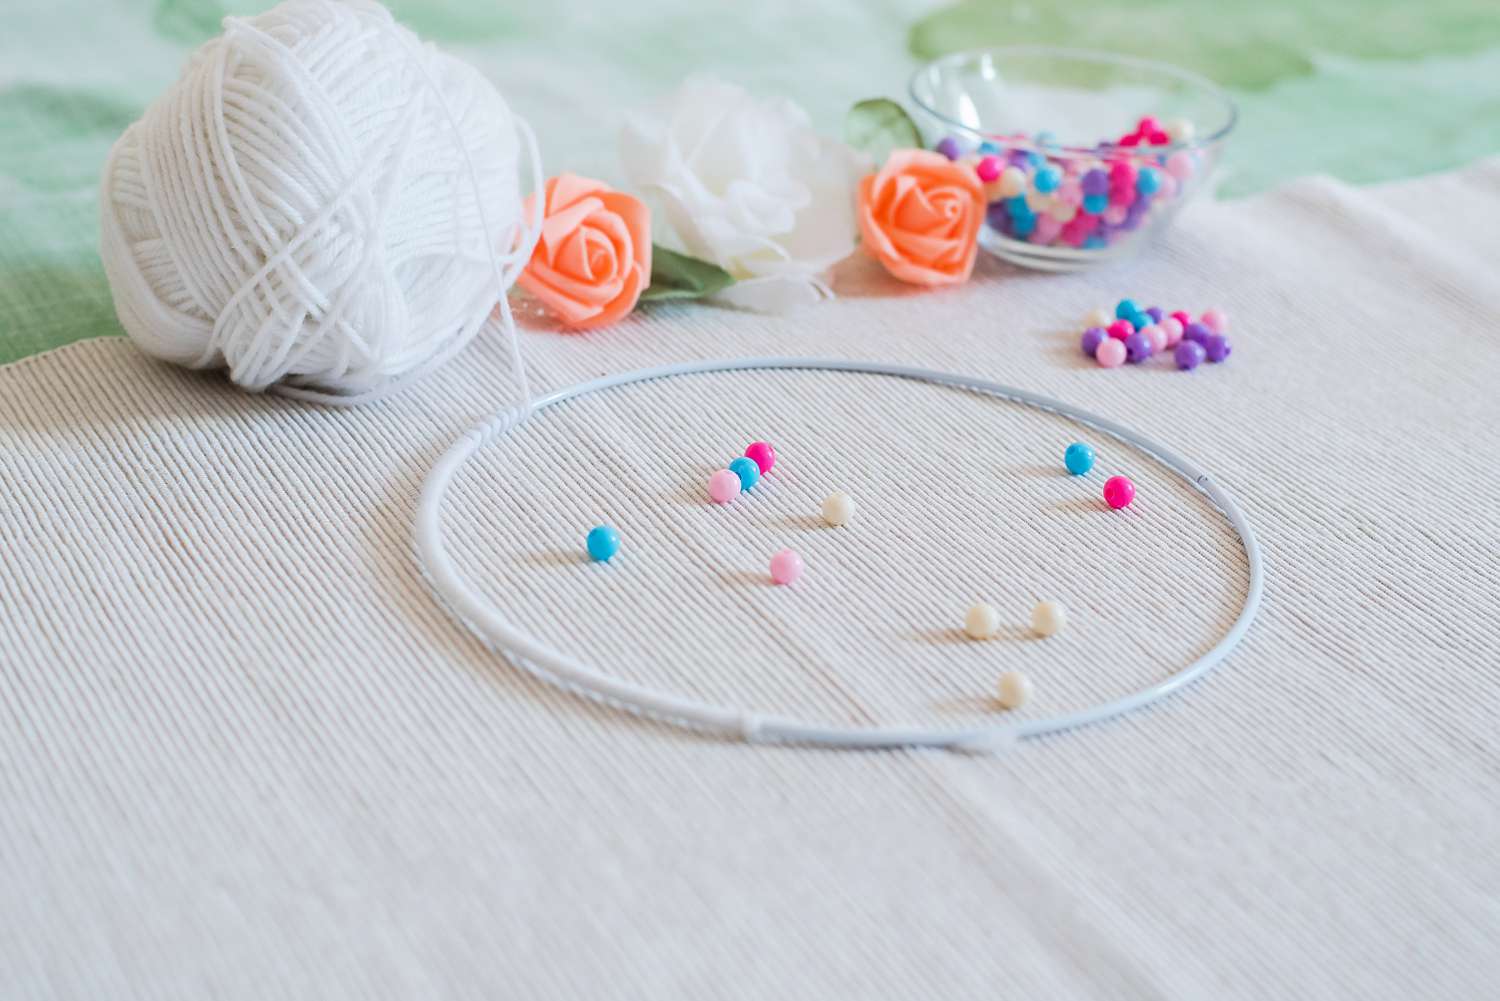
• metal or wooden ring (diameter of about 20cms/7.87in)
• white wool (or a color of your choice)
• colorful pearls
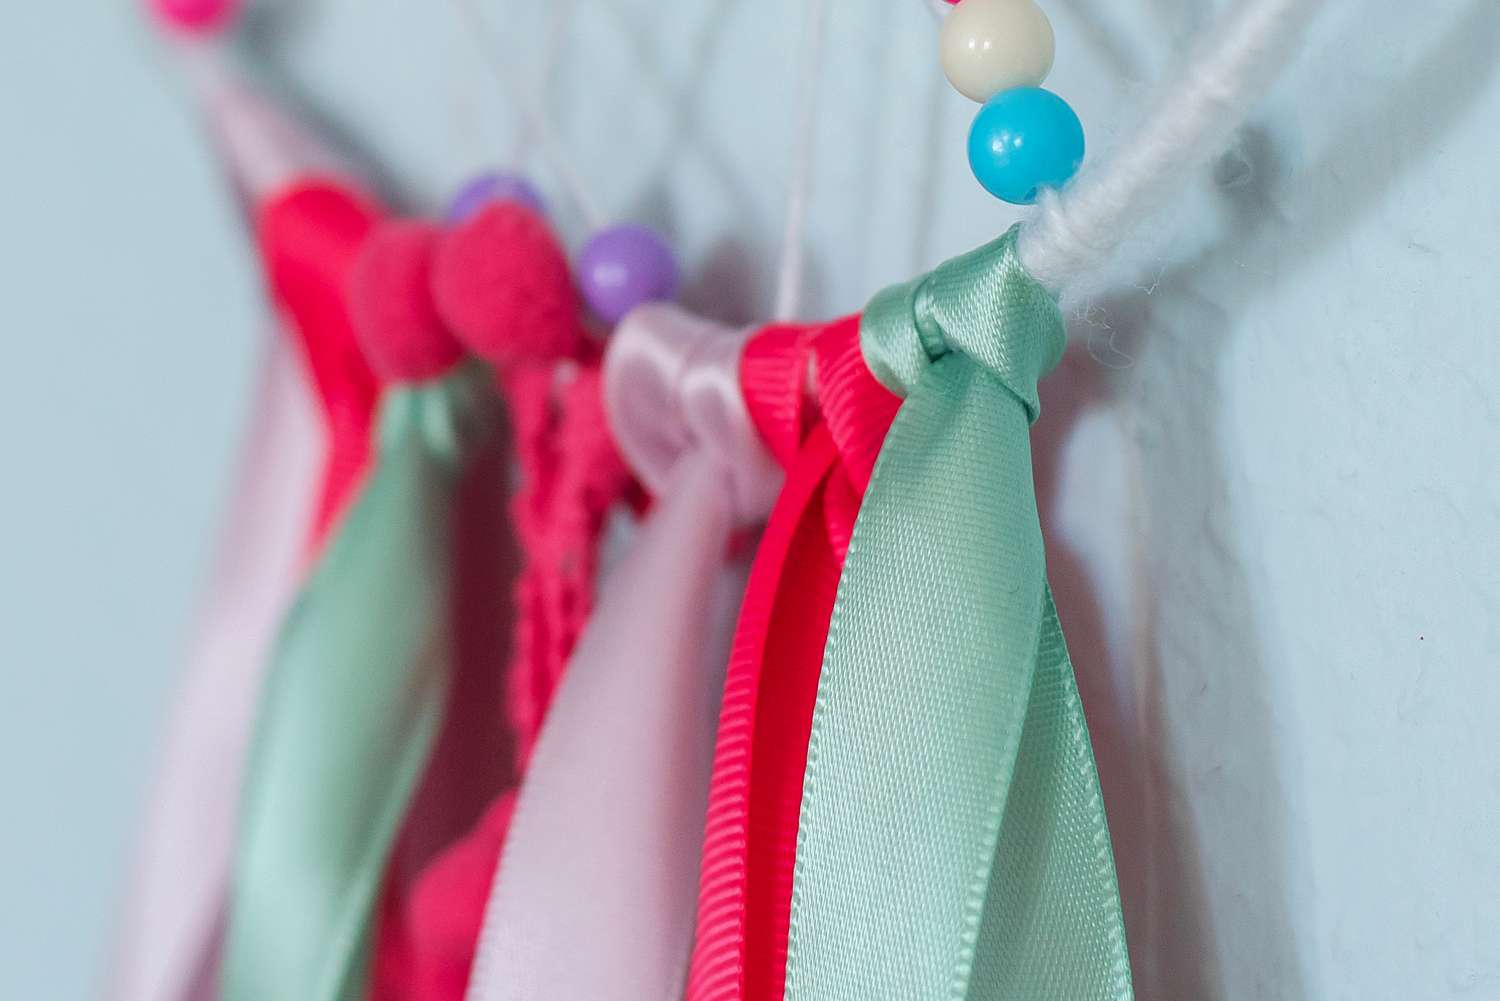
• colorful ribbon (lace, gift ribbon or pompom border works well too)
• fake flowers
• a hot glue gun
• scissors
 Corinna Pongracz Fotografie
 Step-by-Step Instruction:
1. The metal or wooden ring
First of all, you’ll want to wrap your wool of choice around your ring. To do this, take a bit of your wool and tie it to your ring, it’s important that you don’t cut your wool from its ball! As soon as the knot is tightly secured, you can start tightly wrapping the wool around the ring. You might have to push your wool together a couple of times while you do this, to make sure it stays tightly wrapped. When you’ve covered the whole ring, tie both ends together. You’ll need a bit of practice and patience, but you’ll get the hang of it soon!
Thicker wool helps speed up the wrapping process.
2. The dreamcatcher’s net
To make the dreamcatcher’s net, you’ll need 2-3meters/3.2-6.5feet of wool. You’ll cut this amount of wool from its ball and tie it to the ring. If you want to decorate your net with some pretty pearls, now is the time to find 3 pearls of different colors and get them ready. Let’s get the net started!
Thread your pearls onto the wool, stretch it across the ring, wrap it around the ring once and repeat until your net looks decently covered. Then, tie your wool around the ring again, knot it tightly in place and cut the rest of the yarn.
3. The ribbons
It’s time to decorate the dreamcatcher with all your colorful ribbons! You can settle for any length you’d like to have, just make sure you cut your ribbons in double the length you’d like them to be in the end. Fold the respective ribbons in half, so that you have sort of a loop. Lay this loop across the ring (from the front to the back) and pull both ends through the loop to secure it in place.
 Corinna Pongracz Fotografie
 4. The flowers
Now you’ll attach the flowers on the upper rim, where you tied the end pieces of your wool to the ring. You can simply use a hot glue gun to attach them where you’d like, and your dreamcatcher is done! Make sure you let the glue settle and cool off before finding a spot to put the dreamcatcher up.
It seems like it’s a lot of work and sort of complicated to DIY a dreamcatcher at first, but once you’ve got all the materials and taken a look at this instruction, it’s not that hard at all! These dreamcatchers are not only amazing for your own kid(s), they’re also a great gift for your kid’s best friends! There’s an infinite amount of unique options to make them, so that everyone can get their own special present.
Have fun with this DIY and happy crafting!
 Corinna Pongracz Fotografie
 Author’s profile: Corinna is a graphic designer, photographer, wife and mom. Her blog knuffelknutscher.de includes fun, honest and creative posts about the wonderful, chaotic, and colorful life as a working mom as well as recipes and craft projects.